Monday, June 18, 2012

Techie Tips For The New Blogger!


At 9 a.m. this morning, I was literally pleading to my computer.

“No, no, no! Please don’t do that!” Then it did it. On purpose. I wailed, “Noooooo!” as I shook my fist at the screen. I almost did the sobbing-against-the-wall-as-I-slide-downwards move. Yes, it was THAT dramatic. Even my 3-year-old boy started to shake his fist in the air and yell “nooooo!" Drama, drama, just like his mama.

What caused this uproar and wailing, you ask?
4 mean, little letters to the untrained eye: “HTML.”

Using a basic Blogger template, I tried HTML coding for the first time (just by watching a 3-minute YouTube video that didn’t have anyone speaking or enumerating instructions, go figure!) and it made my blog all funky. The margins were off and the text box became white and off-centered. It was bad.

Basically, what I did was this: I looked through every single html line and tried to type a “yes” for a “no” in the middle of thousands of random numbers, letters, and symbols that I thought it would fit. Smart. Then, trying to undo it, I couldn’t remember where I plugged the random “yes” in. New bloggers you know what I’m talking about!

Desperate, I went to a few teacher blogs and guess what? Others have already figured out the most common HTML codes for teacher blogs! In language and instructions I can actually understand!

BIGGEST TIP: When you do find yourself in the huge HTML page, hit “CTRL+F” and type in a snippet or paste whatever you are trying to find in the search box. This will help you find whatever you need in that crazy language. Then plug in given HTML code as directed. I wish I knew that this morning.

Here are a few of my favorite (and easiest) HTML coding tricks so far:

1. Feedjit: We are all curious to see who visits our page! This tracks who visits your page and where they are from. Every blog has this.

Click here.

2. Common Core Widget App:
Because we need to know if the TPT file we’re making aligns with the common core.

Click here.

3. Take off the annoying “verify you’re a human” typing box for readers:
It’s one less step to do before a reader posts a comment on your blog. It’s so dang hard to read what those made-up verification words are anyway so you get them wrong anyway. You probably have this default setup on your blog too. Maria at Kinder-Craze shares this tutorial!
Click here.

4. Scroll to top:
After reading a really long blog post, readers want to just get back to the top of the page. Here’s how to do that. Andrea at Cheers to School shares this tutorial!
Click here.

5. Create a link within your text:
I used to just copy and paste the actual web address onto my blog and told readers to “click here!” So you saw this insanely long address within my blog entry. Here’s how to take it out so readers would just have “click here” when trying to get to the link you’re providing. It makes your blog post look less messy. Cindy at In The Teachers' Lounge shares this tutorial. Click on example below.

Click here.

6. Erase shadows on pictures:
The best tip ever!! I tried to erase the “shadows” or white borders around pictures and clip art using picture editors, etc. It was time-consuming, ridiculous, and I gave up. Then I saw this tutorial on how to take the white borders off pictures! My mouth dropped. So easy! Cara at Teaching My Calling shares this tutorial. Check it out!

Click here.

I hope these beginner blogging tips help you with your own blogging adventures. I will try and add more of my favorite (and easiest) tips since I’m still learning too!

Hours and hours later, my brand new blog looks like a pro’s…oh how I wish! :) But I think that if I can do it, you can too!! Let me know how it works for you!

Thanks for visiting,
Joelle


I Can...Be Organized!

Yay! It's summer!

I love summer because not only do I get to do whatever I want to my kids want to do for a couple of months, I also look forward to August (or September) when we, as teachers, are given a fresh, new start!

My summers are spent with my own kiddos, but during their nap time, I catch up on my t.v. shows (Suits and Big Bang Theory!) and also think about how the new school year will go. Yes, I can't stop thinking about school. I'm crazy.

I enjoy creating new things and revamping my classroom each summer so I can make my life easier for the upcoming school year. I like my classroom to be clean, organized, matching, and most things to be accessible and easy for my little friends and I to use. Sometimes I’m at school longer than I’m at my own home, so I definitely need to feel comfortable and feel like it is my sanctuary!

The posts on this page will feature organization tips that I have incorporated into my classroom and you're welcome to see how I do things in class. I wish that when I was a new teacher 7 years ago, someone helped me figure out the importance of keeping everything in order. I hope I can help you out too!

Please check back here to see pictures of how I'm arranging my new classroom, unit files, my classroom library, etc.!

Thanks for visiting,
Joelle

Beware: A Work In Progress!

“It’s okay, Joelle! I can see that there is a method to the madness!”

My sweet co-teacher assured me when I told her that I didn't know what I was doing with my classroom. She told me that she had walked into my classroom earlier this week to see how things were coming along. How embarrassing! I KNOW what that room looks like and it ain't pretty! Everything is on the floor and scooted to the middle of the room...and I mean EVERYTHING!

Thank goodness she has more faith in me than I have in myself!

I am taking the place of an awesome, awesome teacher (seriously, the principal and her teammates got a little teary-eyed at the end-of-the-year luncheon!) who will be staying home with her baby. I told her not to worry and to leave anything she didn't want to take home. I would take care of the clean up and I was totally okay with that. I would HATE to bend over and scrub tiles and wipe down counters at 7 and a half months pregnant!! Been there, done that! Not fun!

What I didn't realize was that I would have to sort out MY things and HER things. I guess the HUGE pile of "stuff" in the middle of the classroom is now a bit overwhelming! So I procrastinated and ignored the huge mess and instead worked on projects that were NOT on the floor: my bulletin boards!

Anyways, here are a pictures of a few projects that I have been working on!


Cubbies

My first paint job! Nice and shiny! But up close, there are a LOT of uneven paint spots.
  • Side-by-side, these 2 cubby boxes will go under the big main white board in the front of the room.
  • Brown cardboard cubby box inserts for each student to put their things in.
  • The cubby box inserts will house extra supplies, books, and folders.

Curtains

This fabric will be used for my curtains for my three big windows.

I can't do math miscalculated my measurements so I miraculously bought enough fabric for ALL 3 windows!! Imagine that. Originally, I was measuring the fabric PER WINDOW :( Ummm....yeah.

My mom will sew them for me. She asked if I also wanted ruffles on top (yes!) and extra fringe and attached designs on the bottom (no thanks!). I will tie them back with solid green ribbons. I asked our school custodian if I can have curtain rods drilled into the walls and he said that I can do "whatever" I want to the room! Yay! But I think I'll stick with the 3M Command hooks so I don't get in trouble later :)


Word Wall


Do you like how I discriminated against the letters "v, w, x, y, and z?" I ran out of room and I figured there really aren't 
that many words that would go under those letters :)

  • I typed up all the word wall vocabulary words with vowels in red letters and consonants in blue letters.
  • cut and laminated the words.
  • stuck magnets on them.
  • put up each word after they're learned and they stay up the remainder of the year.

The Common Core is incorporating a lot more vocabulary words in all subject areas, so this word wall will have the new vocabulary words posted (laminated and stuck on magnets). In years past, I put all my high-frequency/sight words on my word wall, but I think this year, I will just attach a laminated sight word list in each student's writing folder or in a totally separate folder. 
Math Workshop Rotation Board

  • I covered my bulletin boards with white poster boards first.
  • Added these little border beauties.
  • I used a whole pocket chart instead of cutting up 2 skinny pocket charts in half.
I have no idea if this Math Workshop Rotation board will work with the new core curriculum, but I will try it and see how it goes. If not, I'll be very sad when I have to take it down. It worked really well in my 1st grade class last year.

Got the lime green polka dot bulletin board here.

Got the Math Workshop Rotation Board here.


Reading Strategies Board


All good readers need strategies when they get stuck on a tricky word.

I got the strategies from here.

I am still trying to figure out where I found those CAFE posters.

I added 2 of my own posters (One-To-One Iguana and Blending Bumblebee) because I wanted to fit all of our old reading strategies with the new reading strategies. I also changed the font and pictures because I wanted cuter posters.

Those are my finished projects for now!

----------------------

A couple of things I want to add to complete my classroom decor would be:

1. Green and blue pom pom balls above my reading nook:


2. A lamp shade in the corner of my reading nook:


A teacher in our school had this in her room. SO cute!

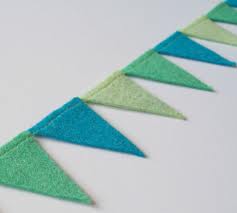
3. Blue and green polka-dot pennants on my white board that I've been seeing a lot in teaching blogs.


4. I would also like to put a little matching curtain in my doorway windows and a little corner table and green lampshade by the doorway.


5. A Dr. Seuss saying in vinyl lettering, and other vinyl lettering sayings, to put on my walls.


I've been on Pinterest and A LOT of other teacher blogs trying to find my favorite ideas to add to my room. Did I mention that my classroom NEEDS to be set up before I leave for my month-long, overseas trip next month? I get back 2 DAYS before the first contract day!! I planned that soooo wrong! I hope I get it done before I leave for my trip and so I can spend more time with my own kiddos this summer.


I will share more pics of the entire classroom when I have it all set up. Then I'll worry about my files - yikes! But I am really excited to see the end results!!

Thanks for visiting,

Joelle

A Sneak Peek Into My New Classroom!


Okay, can I just say that I absolutely LOVE my new classroom?? I do! As much as I enjoyed and took pride in my 1st Grade classroom, it was in the (very) old part of the school building and it smelled like it. I seriously had 3 candle warmers in my room and my little friends loved smelling “birthday cake” and “blueberry cheesecake” all day long. Honestly, I couldn’t smell anything unless I actually stood BY the candle :)

In my old room, I had to be resourceful. I remember walking into my very first classroom at this school.The school just went through a big split and teachers that left for the new school basically took most things that weren't bolted down to the floor :( I was given 5 big rectangular tables, chairs, a box of random books, and random and mismatched furniture. That was it. I had to beg, borrow, trade, and sometimes steal (shhh…) for shelves and cubbies. It's okay, teachers do that.

My walls were dark blue and dark orange carpeting. Yes, CARPET covered my walls. My back wall was supposedly removable. My furniture was mismatched, old, and bought at yard sales and thrift stores. I stole my husband’s shoe rack to put math blocks in and my mom’s dress rack to hang poems on. It took a very long time for my classroom to get it organized to how I wanted it to be.

Anyway, in 2nd grade, I am now in the new part of the building. When I walked into my new classroom, I thought I died and gone to teacher heaven!! Cubby boxes! Shelves! Drawers! Cabinets! And a lot of them! Everywhere I looked, I could put something somewhere and it would be HIDDEN from view. This is a gorgeous room. Oh boy, I am going to be spoiled!

Want to know the absolute BEST PART of my room? It's in my FAVORITE color: Green! Yay! Heaven I tell ya!

Anyway, here are pics of my new room. I haven't moved in yet and this is still the previous teacher's room. When I get done setting up my classroom library, centers, and everything else, I will post more pics. Here they are!


My new home-away-from-home! Goodbye carpeted walls! :)


Thanks for visiting,
Joelle
Friday, May 25, 2012

Welcome to 2nd Grade, Mrs. P.!

Last week, I chose to turn my world upside-down.
On purpose.


When I walked into my first grade classroom last Wednesday morning, little did I know that in exactly an hour and a half, I would be making an important, life-altering (for me) decision.

This was the conversation I had last week with my principal. I saw her standing outside the school office. With 5 minutes left of recess, our little chat went like this:

Mrs. P. - Hello principal! So, are there any job openings right now?

Principal - Yep! 2nd grade. You want it?

Mrs. P. - Would you ever consider me? (almost jokingly.)

Principal - Sure! It's yours! I can take it off the job board now!

Mrs. P. - Yes!

(Principal walks into her office to what I assume was "taking the job off the job board").

So there I was, at 9:14 a.m., standing in disbelief, in front of the school office. I did not really understanding what just happened there. I guess I was now a second grade teacher?

As I walked back to my classroom at the other end of the school, I continued the remainder of the school day in a daze. The next day, I felt like a shaken soda pop can ready to explode and tell the entire world (well, maybe the faculty) what I just did; I was so excited!

Did I just trade in my sanctuary and home-away-from home for a world unknown? But I love my classroom! I love first grade! This was my 6th year teaching 1st grade (7, if you count student teaching) years, and it was the perfect fit for me. It was all I knew, and dare I say, I was actually GOOD at it?

I thought of all the countless hours I spent sheet-protecting each file master for every activity and holiday in first grade, cutting sets of laminated file folder games, and labeling everything in my room.

Am I willing to give it ALL up? 
The answer is, and continues to be as of today, YES.


It helps to know that I am passing my beloved materials to an awesome teacher whom I know will treat my things with respect and love, and with the understanding that they are on loan (her words, I promise!) But I am hoping to love 2nd grade sooooo much that I will never have to ask for everything back after next school year ha ha!

But really, wanna know a major reason I'm moving? Next school year, one of my very, very, very best teacher friends will be staying home to be with her babies. Also, two teachers from our 1st grade team are leaving to teach out-of-state and elsewhere. I know that I personally need the change to help keep my mind off the fact that I am losing 3 really good friends. Basically, my support system and lifelines in the crazy world of teaching are leaving and I just cannot handle that! I am a wreck!

I needed change. So I chose my own change.

I created this blog because I would like to document my journey as a new second grade teacher. I want to share the many challenges and successes I will face in the upcoming school year as I learn a new core curriculum, learn to work with a new team, and get to know my new students.

I am filled with hope that I made the right decision. I am excited to write a new chapter in my teaching career. I am nervous to see if I can do this. Please join me in my new adventure in 2nd grade and learning more about Mrs. P. and the 2nd grade Sweet Peas!

Last week, I chose to turn my world upside-down.
I think I did the right thing.
I'll let you know next May.
Until then, Welcome to 2nd Grade, Mrs. P.!